Before jumping to the steps of the article, I assume the following :
- You already have a Next JS application
- Your app is working perfectly on local environment
- You have a web hosting with cPanel
- Your have a domain name linked to your cPanel
Steps to deploy a Next JS application on cPanel
Step 1.
The first thing you have to do to be able to deploy your application on cPanel is to create a custom Next JS server.
To do so, create a server.js file in the root directory of the project, and add the following code in it.
const { createServer } = require('http')
const { parse } = require('url')
const next = require('next')

const dev = process.env.NODE_ENV !== 'production'
const hostname = 'localhost'
const port = process.env.PORT || 3000

const app = next({ dev, hostname, port })
const handle = app.getRequestHandler()

app.prepare().then(() => {
  createServer(async (req, res) => {
    try {
      const parsedUrl = parse(req.url, true)
      const { pathname, query } = parsedUrl

      if (pathname === '/a') {
        await app.render(req, res, '/a', query)
      } else if (pathname === '/b') {
        await app.render(req, res, '/b', query)
      } else {
        await handle(req, res, parsedUrl)
      }
    } catch (err) {
      console.error('Error occurred handling', req.url, err)
      res.statusCode = 500
      res.end('internal server error')
    }
  }).listen(port, (err) => {
    if (err) throw err
    console.log(`> Ready on http://${hostname}:${port}`)
  })
})
Step 2.
You have to edit the package.json file in order to set the environment to production on the start script
and run the server.js file that you’ve just created in the project root directory.
Basically what we’ve done here is replace the default next start server with our own custom server.
{
   "scripts": {
      "start": "NODE_ENV=production node server.js"
   }
}
Step 3.
It’s time to build your Next JS application. To do so, you just have to run in your Terminal the build script with the npm run build or yarn run build command. Wait a few seconds while Next JS is doing the magic. 🙂
Step 4.
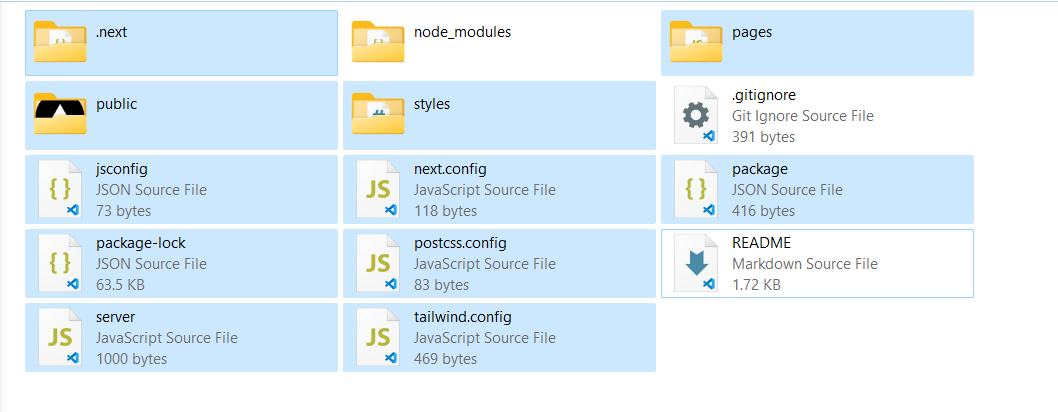
Once the build is finished, open your Next JS project in your file manager to access all the project files and folders. Sometimes, you will need to enable the display of hidden files.
Select all the files and folders except the node_modules and .git folders, and the README.md and .gitignore files. Create a ZIP file with the selected files and folders.
Once that’s done, move to the next step…
Step 5.
It’s time to go to the web hosting. Login to your cPanel, then upload and extract to the root folder of your domain name the ZIP file you’ve just created.
Step 6.
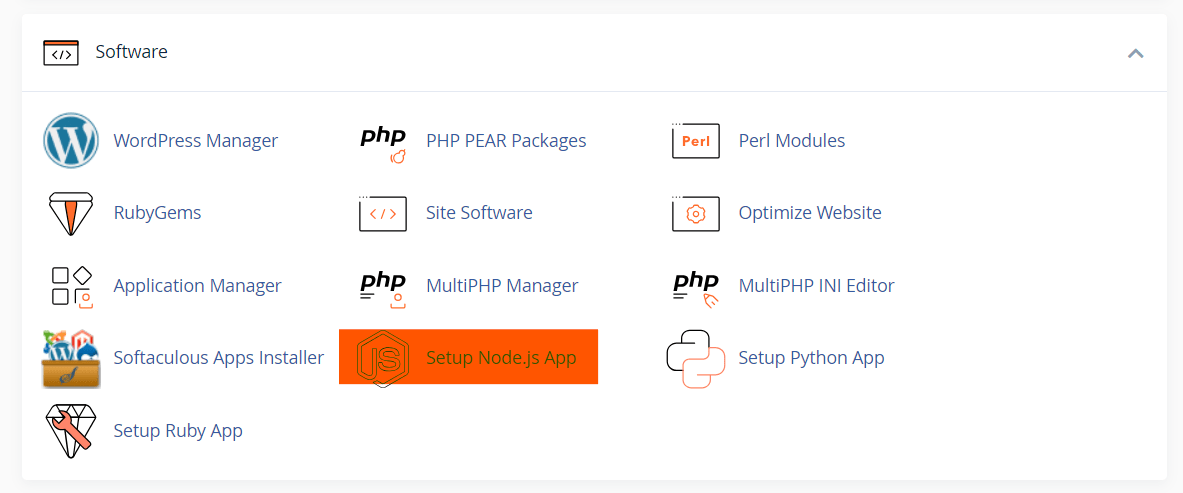
Once all your project files and folders are extracted in the root project of your domain name, go to the Software section of your cPanel and click on Setup Node.js App, then click on + Create Application button.
It’s time to configure your Node Js app :
- Node.js version : select the version that pretty much matches with the Node.js version you used while developing your app locally.
- Application mode : select Production
- Application root : type the path of the root directory where your domain is linked. If you’ve put the project files and folders in the public_html directory, then type « /public_html » (without the quotation marks of course).
- Application URL : select your domain name
- Application startup file : type « server.js »
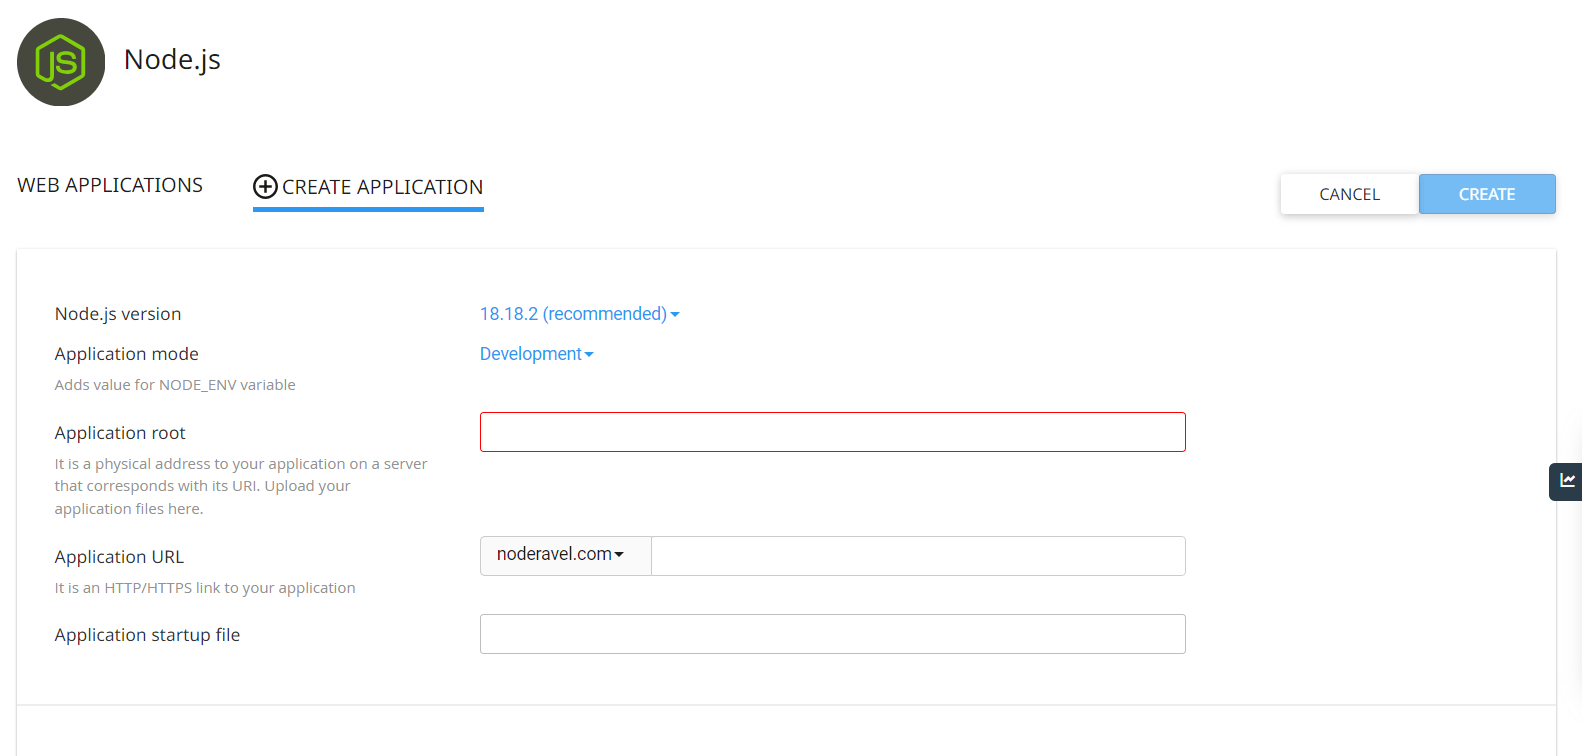
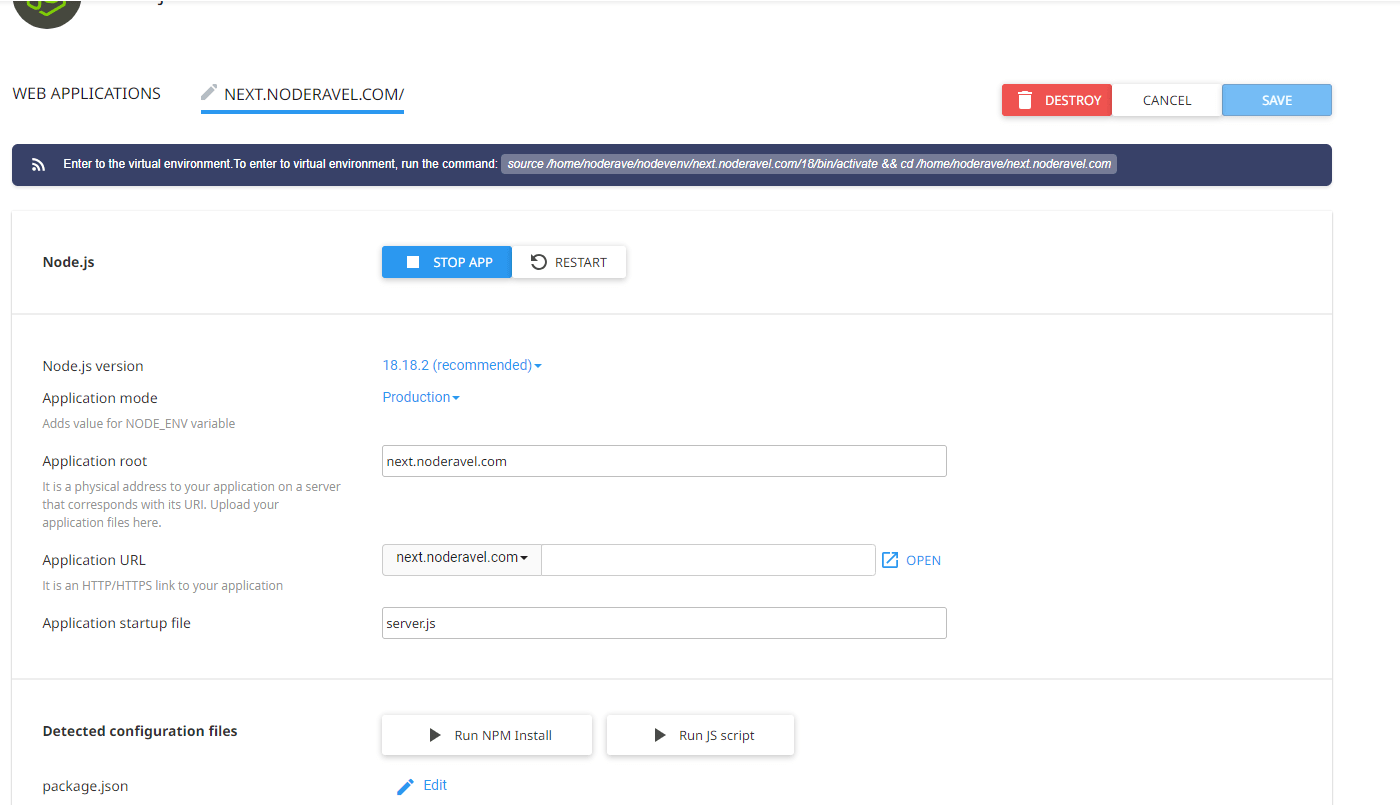
To finish the setup, click on the CREATE button and wait a few seconds. Once the app is created, it will automatically start. You will need to temporarily stop it by clicking on the STOP APP button.
Scroll down a little bit till you see the Detected configuration files section. Click on Run NPM Install to install all the Node JS packages of your project. Once done, start again the app by clicking on the START APP button.
Open your domain name in your browser and boom, your Next JS app is shown, it’s now live… Congratulations, you’ve successfully deployed your Next.js application on cPanel. 👏